
If you’ve just started learning Arduino, congratulations! You’re taking your first step into the world of electronics and embedded systems.
In my video, we covered the Arduino board hands-on and the microcontroller architecture. Now it’s time to write and upload your very first Arduino program.
What You Need
Before you begin, make sure you have:
- An Arduino Uno (or any compatible Arduino board)
- A USB cable
- A Windows, macOS, or Linux computer
- An internet connection
Step 1: Download the Arduino IDE
The Arduino IDE (Integrated Development Environment) is the software used to write and upload programs to your Arduino board.
Visit the official Arduino website and download the latest version of the Arduino IDE for your operating system.
After downloading:
- Run the installer.
- Accept the default installation options.
- Wait for the installation to complete.
- Launch the Arduino IDE.
go to this link and install Arduino IDE according to your system specs : https://www.arduino.cc/en/software/
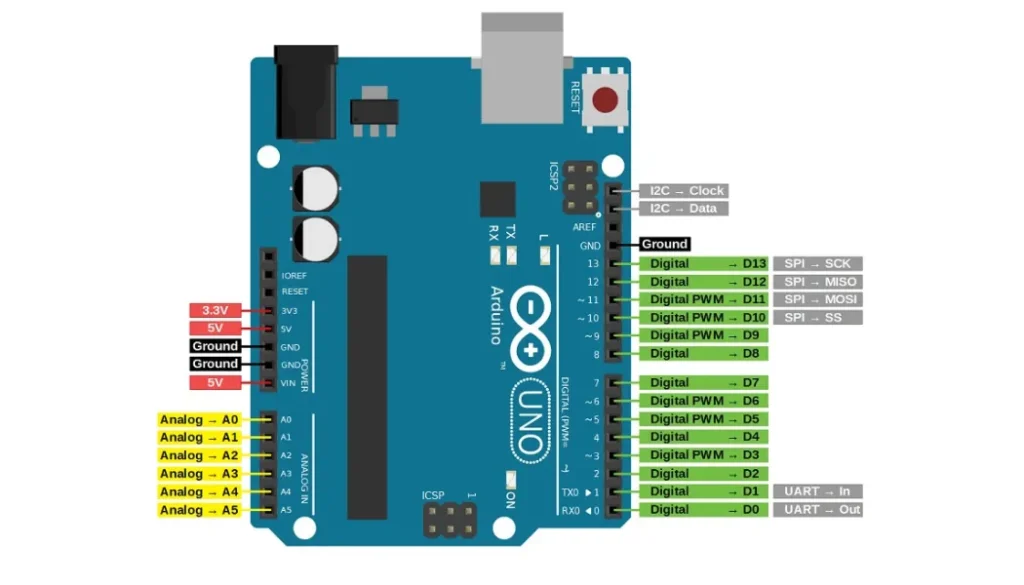
The following image is the pin mapping of the arduino :
Click to Learn about ADC analog pins and DAC Digital pins on Arduino.
Step 2: Connect Your Arduino
Connect your Arduino board to your computer using a USB cable.
Your computer should automatically detect the board and install the required USB drivers. If it doesn’t, allow Windows a few moments to complete the installation.
Step 3: Select Your Board
In the Arduino IDE:
- Open the Tools menu.
- Click Board.
- Select Arduino Uno (or the board you are using).
Selecting the correct board ensures the IDE compiles the program for the right hardware.
Step 4: Select the COM Port
Next, choose the communication port.
- Go to Tools → Port.
- Select the COM port assigned to your Arduino.
If you’re unsure which port is correct:
- Disconnect the Arduino.
- Check the available ports.
- Reconnect the Arduino.
- The new port that appears is your Arduino.
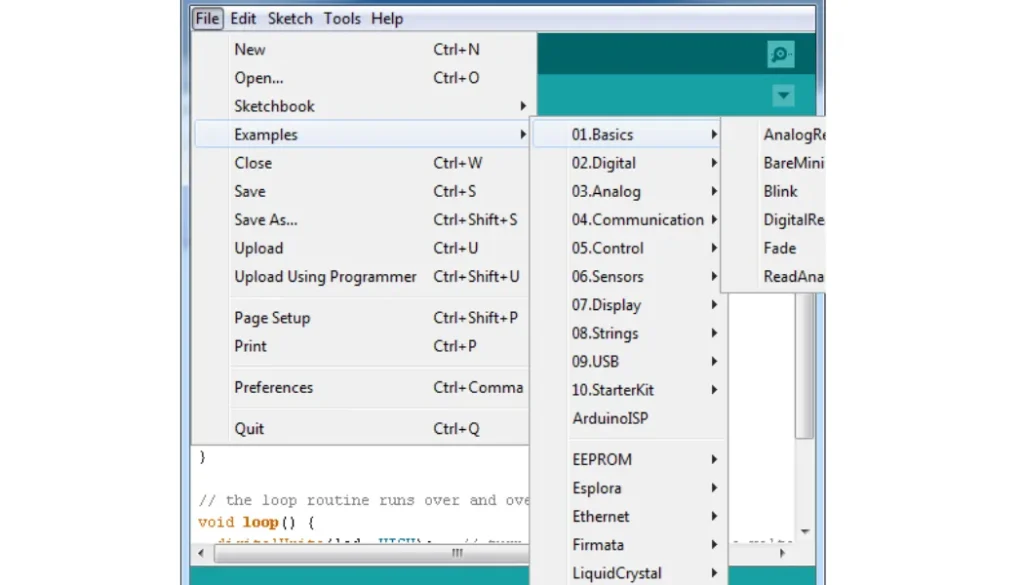
Step 5: Open the Blink Example
Arduino comes with many built-in example programs.
Open:
File → Examples → 01.Basics → Blink
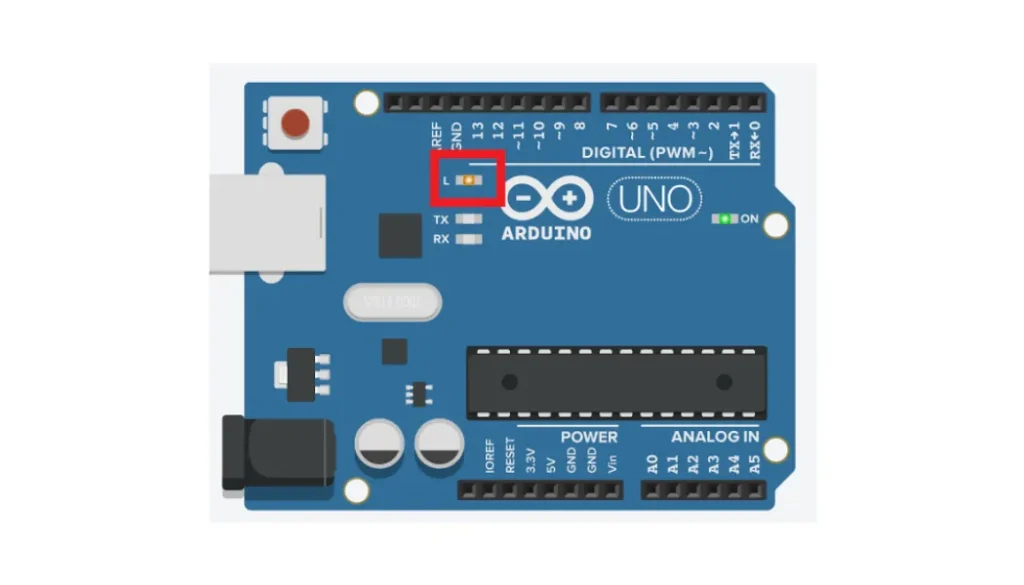
This example blinks the built-in LED on the Arduino board.
Built in led on the board :
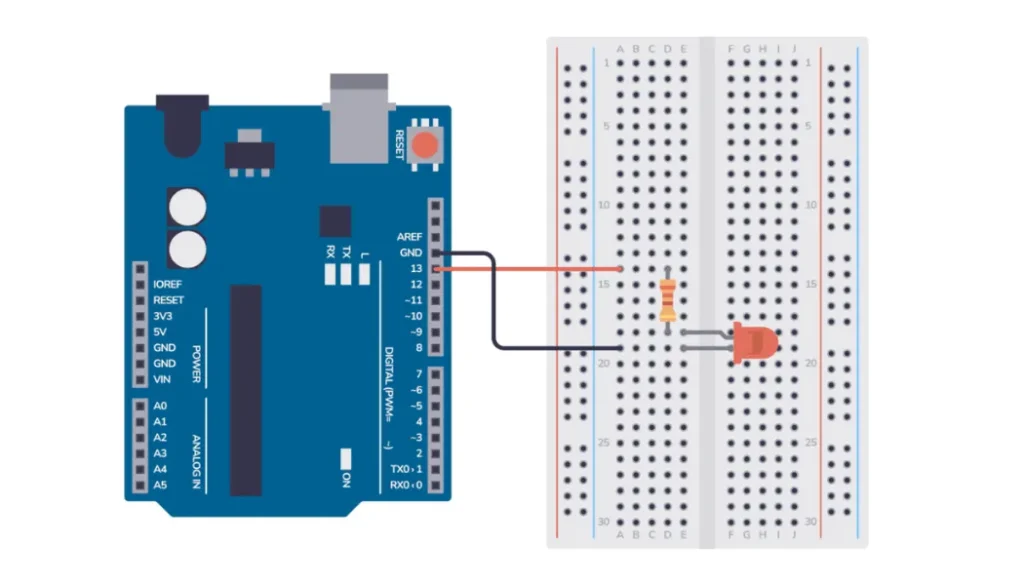
you can also connect external led on pin 13 on the board like this >>
Learn Step 7: Upload the Program
Click the Upload (→) button.
The IDE will compile the sketch again and send it to the Arduino board.
After a few seconds, you’ll see “Done Uploading.”
The built-in LED should now start blinking once every second.
Congratulations! You have uploaded your first Arduino program.
What If the Upload Fails?
If you receive an error:
- Make sure the correct board is selected.
- Check that the correct COM port is selected.
- Ensure the USB cable supports data transfer (some cables are power-only).
- Close any other software that may be using the COM port.
- Disconnect and reconnect the Arduino.
Most upload problems are caused by selecting the wrong COM port or using a charging-only USB cable.
What’s Next?
Now that you’ve successfully uploaded your first program, you’re ready to start learning how Arduino programming works.
In the next lessons, we’ll explore:
- The structure of an Arduino program
- The
setup()andloop()functions - Variables and data types
- Digital input and output
- Reading sensors
- Controlling LEDs, relays, motors, and displays
Take your time, experiment with the examples, and don’t be afraid to make mistakes. Every successful Arduino project starts with this very first upload.
Happy coding! Here is Also a Youtube video in urdu I have done for my paki enthusiast 🙂
Want to buy new arduino ? here is the link >>> < Arduino >.